
To do that, you utilize Home windows’ OneDrive Recordsdata On-Demand function. With it, you may select to maintain solely sure information in your PC, however nonetheless have entry to all of your different OneDrive information within the cloud. Whenever you wish to use a type of on-line information, you open it instantly from the cloud. With fewer information in your PC syncing, you need to see a efficiency enhance.
Proper-click the OneDrive icon on the fitting aspect of the taskbar and choose Settings > Account > Select folders. From the display that seems, uncheck the folders that you really want saved on-line reasonably than in your PC, to avoid wasting area, then click on OK.
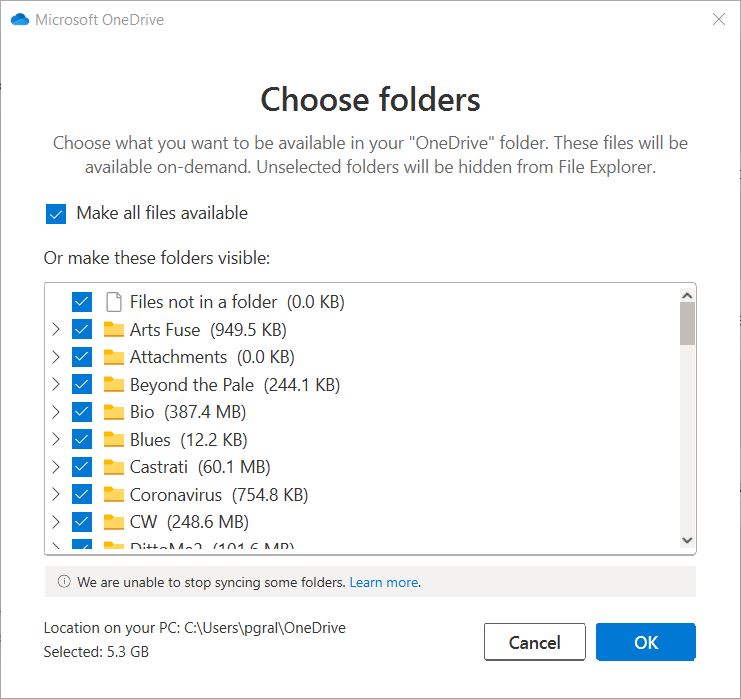
Use this dialog field to decide on which folders can be saved in your PC.
Preston Gralla / Foundry
Whenever you do this, all of the information within the folders you unchecked can be set to online-only, which implies they’re solely obtainable from OneDrive within the cloud, not in your PC. To any extent further, when wish to open a type of information, you’ll need to be on-line.
Return to this display if you wish to change which information are stored regionally in your PC, and which within the cloud solely.
8. Flip off search indexing
Home windows 10 indexes your laborious disk within the background, permitting you — in concept — to go looking your PC extra shortly than if no indexing have been being accomplished. However slower PCs that use indexing can see a efficiency hit, and you’ll give them a velocity enhance by turning off indexing. Even in case you have an SSD disk, turning off indexing can enhance your velocity, as a result of the fixed writing to disk that indexing does can finally decelerate SSDs.
To get the utmost profit in Home windows 10, you’ll want to flip indexing off utterly. To take action, sort companies.msc within the Home windows search field and press Enter. The Companies app seems. Scroll right down to both Indexing Service or Home windows Search within the listing of companies. Double-click it, and from the display that seems, click on Cease. Then reboot your machine. Your searches could also be barely slower, though you could not discover the distinction. However you need to get an general efficiency enhance.

Right here’s flip off Home windows 10 indexing.
Preston Gralla / Foundry
When you’d like, you may flip off indexing just for information in sure areas. To do that, sort index within the Home windows search field and click on the Indexing Choices end result that seems. The Indexing Choices web page of the Management Panel seems.
Click on the Modify button, and also you’ll see a listing of areas which might be being listed, together with Microsoft Outlook, Web Explorer Historical past, and your laborious drive or drives. Uncheck the field subsequent to any location, and it’ll not be listed. When you’d wish to customise what will get listed and what doesn’t on particular person drives, click on the down arrow subsequent to any drive and verify the field subsequent to what you need listed and uncheck the field of what you don’t.
9. Clear out your laborious disk
When you’ve acquired a bloated laborious disk full of information you don’t want, you possibly can be slowing down your PC. Cleansing it out may give you a velocity enhance. Home windows 10 has a surprisingly helpful built-in software for doing this referred to as Storage Sense. Go to Settings > System > Storage and on the prime of the display, transfer the toggle from Off to On. Whenever you do that, Home windows always displays your PC and deletes previous junk information you not want — non permanent information, information within the Downloads folder that haven’t been modified in a month, and previous Recycle Bin information.
You may customise how Storage Sense works and likewise use it to unencumber much more area than it usually would. Beneath Storage Sense, click on Configure Storage Sense or run it now. From the display that seems, you may change how typically Storage Sense deletes information (day-after-day, each week, each month or when your cupboard space will get low).
It’s also possible to inform Storage Sense to delete information in your Downloads folder, relying on how lengthy they’ve been there, and set how lengthy to attend to delete information within the Recycle Bin robotically. It’s also possible to have Storage Sense transfer information out of your PC to OneDrive cloud storage in the event that they’re not opened for a sure period of time (day-after-day, or each 14 days, 30 days, or 60 days).
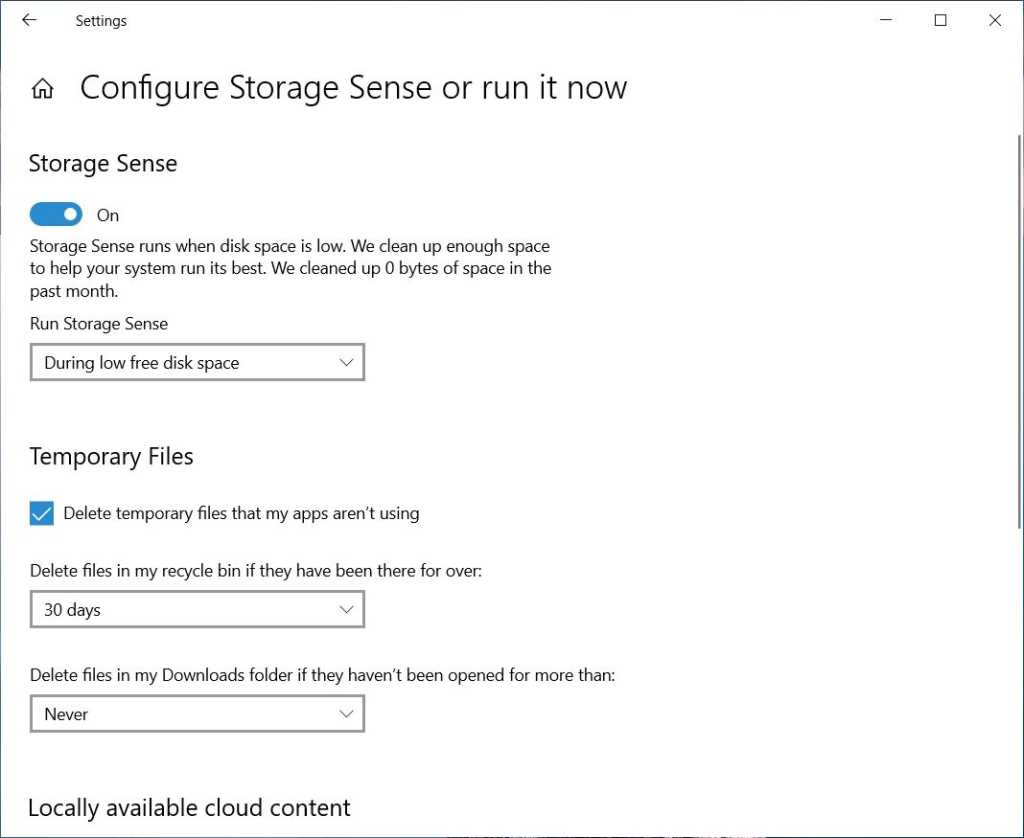
Right here’s customise the best way Storage Sense works.
Preston Gralla / Foundry
For extra disk-cleaning suggestions, see “7 steps to a lean, clear Home windows machine.”
10. Clear out your Registry
Underneath the hood, the Home windows Registry tracks and controls practically the whole lot about the best way Home windows works and appears. That features details about the place your applications are saved, which DLLs they use and share, what file varieties ought to be opened by which program, and nearly the whole lot else.
However the Registry is a really messy factor. Whenever you uninstall a program, for instance, that program’s settings don’t all the time get cleaned up within the Registry. So over time, it will probably get full of numerous outdated settings of all sorts. And that may result in system slowdowns.
Don’t even consider attempting to wash any of this out your self. It’s unattainable. To do it, you want a Registry Cleaner. There are loads obtainable, some free and a few paid. However there’s actually no have to outright purchase one, as a result of the free Auslogics Registry Cleaner does a strong job.
Earlier than utilizing Auslogics or another Registry cleaner, you need to again up your Registry so you may restore it if something goes flawed. (Auslogics Registry Cleaner does this for you as nicely, however it will probably’t damage to have it backed up twice.) To do your individual Registry backup:
- Sort regedit.exe within the search field, then press Enter. That runs the Registry editor.
- From the File menu, choose Export.
- From the display that seems, be certain to decide on the All choice within the “Export vary” part on the backside of the display. Then select a file location and file identify and click on Save.
- To revive the Registry, open the Registry editor, choose Import from the File menu, then open the file you saved.
Now obtain, set up, and run Auslogics Registry Cleaner. On the left-hand aspect of the display you may choose the sorts of Registry points you wish to clear up — for instance, File Associations, Web, or Fonts. I typically choose all of them.
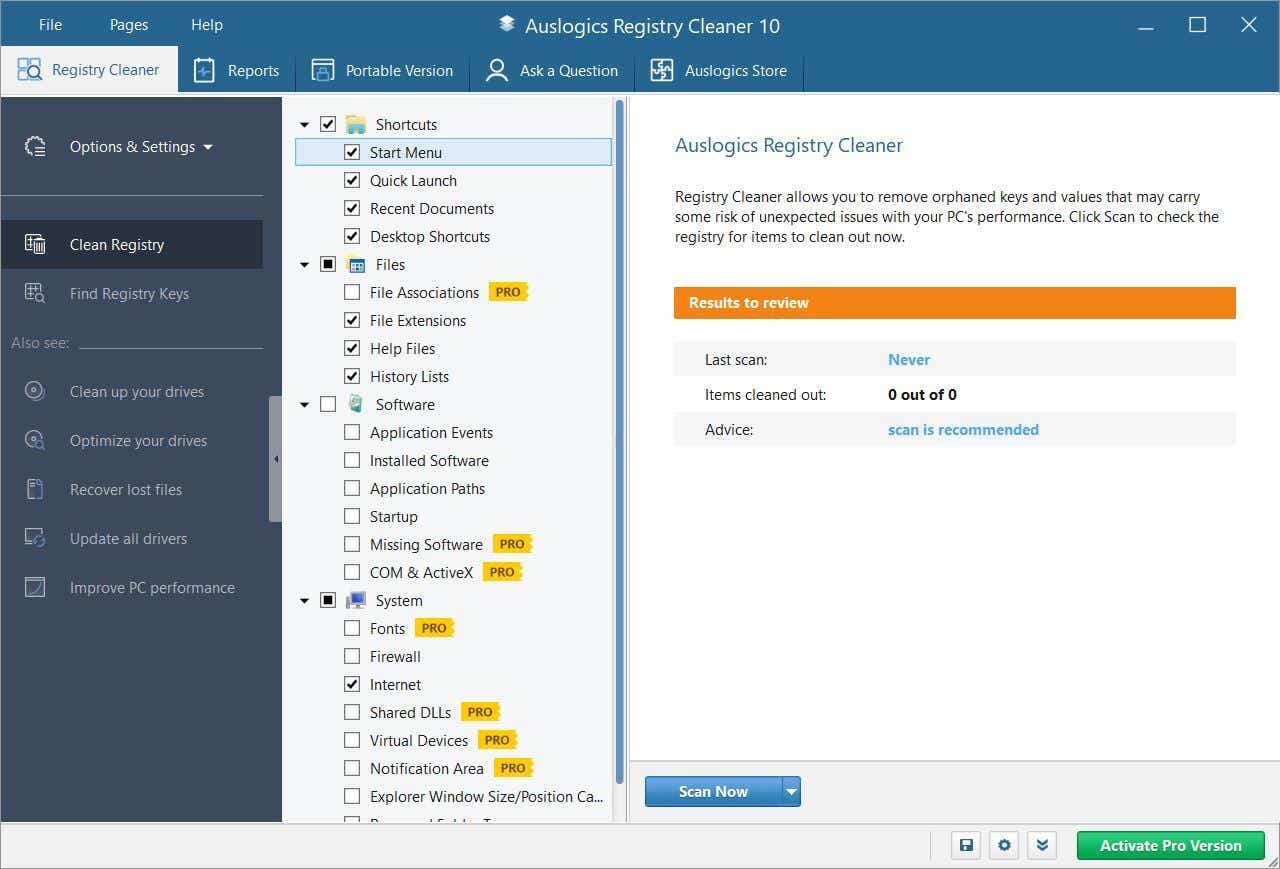
Auslogics Registry Cleaner scans for and fixes issues in your Home windows Registry.
Preston Gralla / Foundry
Subsequent, inform it to scan the Registry for issues. To try this, click on Scan Now, and from the drop-down menu that seems, choose Scan. That allows you to first study the Registry issues it finds. (When you as a substitute select Scan and Resolve, it makes the fixes with out you checking them.)
It now scans your Registry for errors, then exhibits you what it discovered. Uncheck the containers subsequent to any you don’t need it to repair. Click on Resolve once you’ve made your determination, and make it possible for Again Up Modifications is checked, so you may restore the Registry simply if one thing goes flawed. If you wish to see particulars about what it’s accomplished, click on View detailed report on the backside of the display.
11. Disable shadows, animations, and visible results
Home windows 10 has some good eye sweet — shadows, animations, and visible results. On quick, newer PCs, these don’t normally have an effect on system efficiency. However on slower and older PCs, they’ll actual a efficiency hit.
It’s straightforward to show them off. Within the Home windows 10 search field, sort sysdm.cpl and press Enter. That launches the System Properties dialog field. Click on the Superior tab and click on Settings within the Efficiency part. That brings you to the Efficiency Choices dialog field. You’ll see a various listing of animations and particular results.
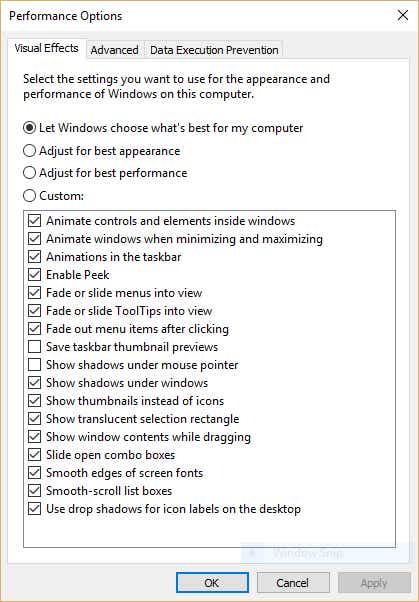
The Efficiency Choices dialog field enables you to flip off results that is perhaps slowing down Home windows 10.
Preston Gralla / Foundry
If in case you have time in your arms and like to tweak, you may flip particular person choices on and off. These are the animations and particular results you’ll most likely wish to flip off, as a result of they’ve the best impact on system efficiency:
- Animate controls and components inside home windows
- Animate home windows when minimizing and maximizing
- Animations within the taskbar
- Fade or slide menus into view
- Fade or slide ToolTips into view
- Fade out menu gadgets after clicking
- Present shadows below home windows
Nonetheless, it’s most likely loads simpler to only choose Regulate for finest efficiency on the prime of the display after which click on OK. Home windows 10 will then flip off the consequences that decelerate your system.
12. Disable transparency
Along with turning off shadows, animations, and visible results, you must also disable the transparency results that Home windows 10 makes use of for the Begin menu, the taskbar, and the Motion Middle. It takes a stunning quantity of labor for Home windows to create these transparency results, and turning them off could make a distinction in system efficiency.
To do it, from Settings, select Personalization > Colours, scroll right down to “Transparency results” and transfer the slider to Off.
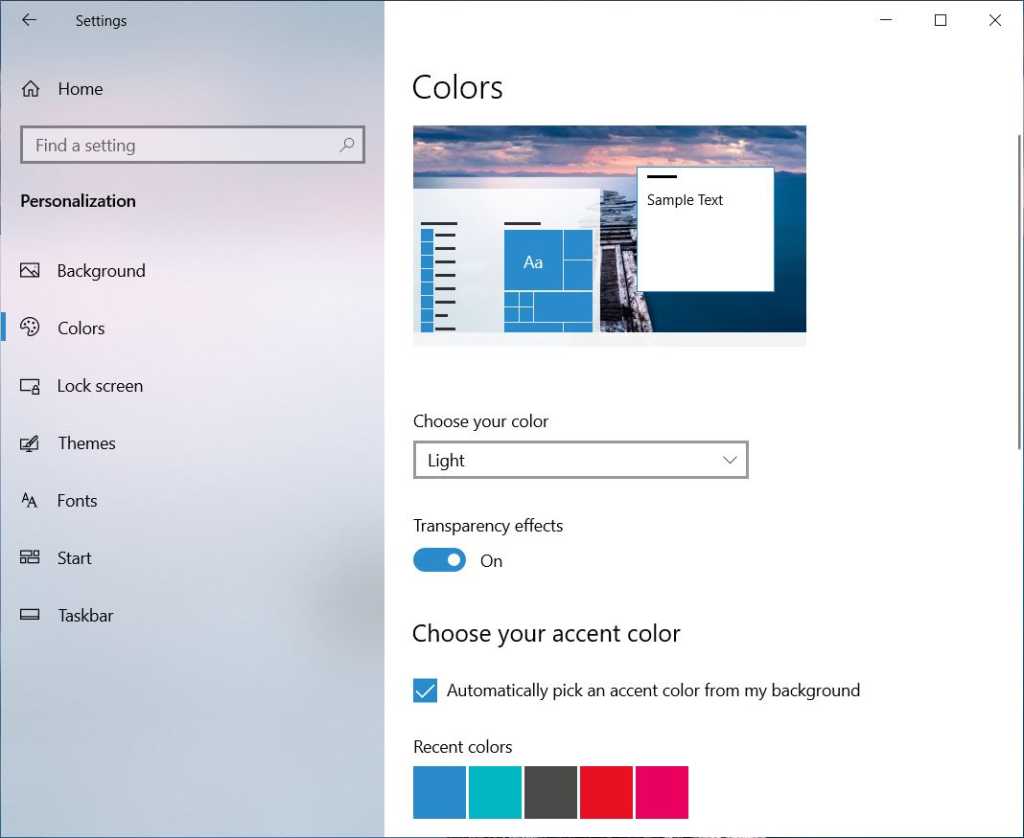
Turning off Home windows 10’s transparency results may also help velocity up efficiency.
Preston Gralla / Foundry
13. Replace your gadget drivers
Home windows 10 can take an enormous efficiency hit if it’s utilizing outdated drivers. Putting in the most recent ones can go a good distance in the direction of rushing it up. Significantly problematic are graphics drivers, so these are those you need to be certain to replace. To do it:
- Sort devmgmt.msc into the Search field and click on the Gadget Supervisor icon that seems in the fitting pane.
- Scroll to the Show Adapters entry and click on the side-facing arrow to increase it.
- Proper-click the motive force that seems.
- From the context menu that seems, choose Replace driver.
You’ll be requested whether or not to have Home windows seek for an up to date driver or if you wish to discover one and set up it manually. Your finest guess is to let Home windows do the work. Observe the on-screen directions to put in the motive force.

Updating your gadget driver with the Gadget Supervisor may give Home windows 10 a velocity enhance.
Preston Gralla / Foundry
For assist clearing out previous drivers after you’ve put in the brand new ones, see “Easy methods to scale back Home windows driver bloat.”
14. Activate automated Home windows upkeep
Daily, behind the scenes, Home windows 10 performs upkeep in your PC. It does issues like safety scanning and performing system diagnostics to verify the whole lot is as much as snuff — and robotically fixes issues if it finds them. That makes certain your PC runs at peak efficiency. By default, this computerized upkeep runs day-after-day at 2:00 a.m., so long as your gadget is plugged into an influence supply and is asleep.
There’s an opportunity, although, that the function has been unintentionally turned off otherwise you haven’t had your PC plugged in for some time, so the upkeep hasn’t been accomplished. You can also make certain it’s turned on and runs day-after-day, and run it manually when you’d like.
Run the Management Panel app and choose System and Safety > Safety and Upkeep. Click on the down arrow within the Upkeep part, and below Automated Upkeep, click on Begin upkeep if you’d like it to run now. To make it possible for it runs day-after-day, click on Change upkeep settings, and from the display that seems, choose the time you’d like upkeep to run and verify the field subsequent to Permit scheduled upkeep to get up my laptop on the scheduled time. Then click on OK.

You may designate a time every day for Home windows to run its upkeep duties.
Preston Gralla / Foundry
15. Kill bloatware
Typically the most important issue slowing down your PC isn’t Home windows 10 itself, however bloatware or adware that takes up CPU and system sources. Adware and bloatware are notably insidious as a result of they could have been put in by your laptop’s producer. You’d be amazed at how far more shortly your Home windows 10 PC can run when you eliminate it.
First, run a system scan to search out adware and malware. When you’ve already put in a safety suite equivalent to Norton Safety or McAfee LiveSafe, you need to use that. It’s also possible to use Home windows 10’s inbuilt anti-malware app — simply sort home windows safety within the search field, press Enter, after which choose Virus & menace safety > Fast Scan. Home windows Defender will search for malware and take away any it finds.
It’s a good suggestion to get a second opinion, although, so think about a free software like Malwarebytes. The free model scans for malware and removes what it finds; the paid model provides always-on safety to cease infections within the first place.

Malwarebytes is a helpful utility that can scan for and take away malware.
Preston Gralla / Foundry
Now you may verify for bloatware and eliminate it. A great program to try this is PC Decrapifier. And Ought to I Take away It? is a web site that gives recommendation on what information could also be malware or bloatware.
For extra particulars about eradicating bloatware, try “Bloatware: What it’s and eliminate it.”
16. Defrag your laborious disk
The extra you utilize your laborious disk, the extra it will probably grow to be fragmented, which may decelerate your PC. When a disk will get fragmented, it shops information willy-nilly throughout it, and it takes some time for Home windows to place them collectively earlier than working them.
Home windows 10, although, has a built-in defragmenter you need to use to defragment your laborious disk. You may even inform it to run robotically so it stays always defragmented.
To do it, sort defrag into the search field and press Enter. From the display that seems, choose the drive you need you wish to defragment. Click on the Optimize button to defragment it. Choose a number of disks by holding down the Ctrl key and clicking every one you wish to defragment.
If you wish to have your disk or disks defragmented robotically, click on the Change settings button, then verify the field subsequent to Run on a schedule. Now choose the frequency at which you need the disk(s) defragmented by clicking the drop-down subsequent to Frequency and choosing Day by day, Weekly, or Month-to-month. (Weekly can be your finest guess.) From this display you may as well select a number of drives to defragment.

You may set Home windows 10’s built-in disk defragmenter to run robotically on a schedule.
Preston Gralla / Foundry
Be aware: If in case you have an SSD, defragging received’t provide any noticeable efficiency enhance, and it may trigger put on on the disk. So it’s not value your whereas to defrag SSDs.
17. Disable Recreation Mode
When you’re a severe gamer, you most likely know all about Recreation Mode, which optimizes your PC for taking part in video games. That’s nice for once you’re doing simply that, however it will probably decelerate your system once you’re not enjoying as a result of it retains some system sources in reserve in case you begin enjoying a recreation and has often been linked to stability points. So turning off Recreation Mode may give your PC a fast enhance. (You may all the time flip it again on once more once you wish to play a recreation.)
Recreation Mode is turned on by default, so even when you’ve by no means performed a recreation in your PC, it’s most likely enabled. To show it off, go to Settings > Gaming > Recreation Mode and transfer the Recreation Mode slider to Off.
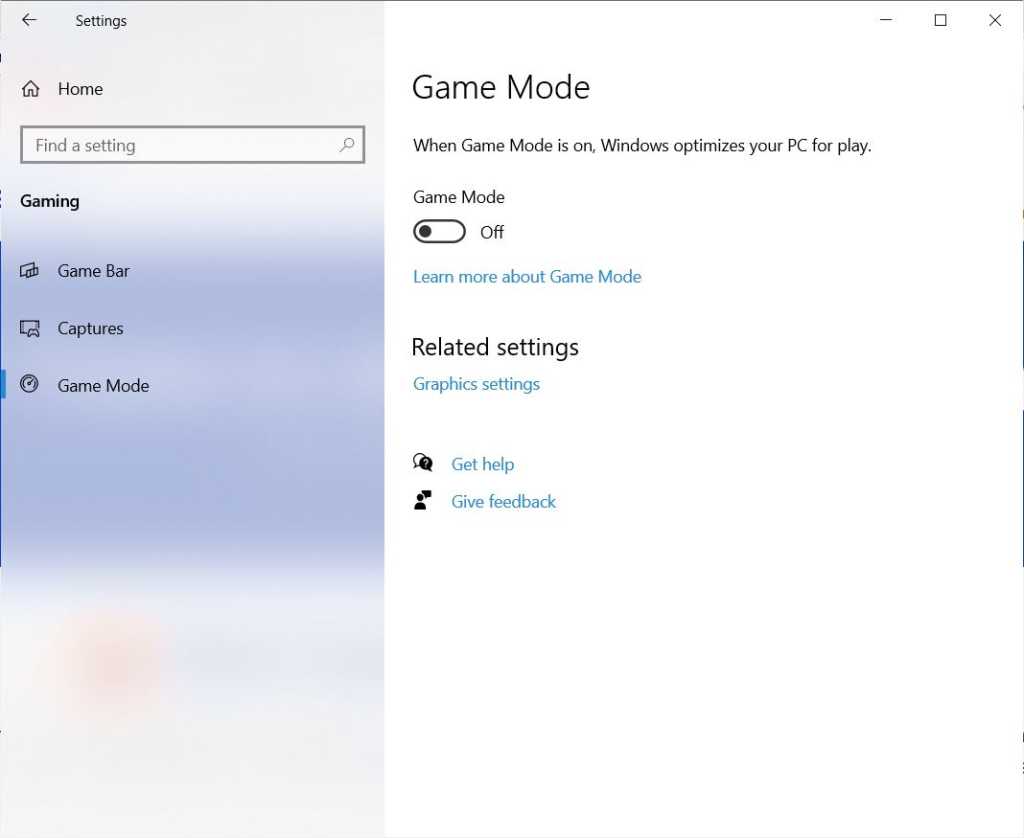
Turning off Recreation Mode may give your PC an instantaneous enhance.
Preston Gralla / Foundry
18. Run Home windows troubleshooters
Home windows 10 has a helpful built-in troubleshooting software that be certain your PC runs as shortly as potential with out you having to do a factor. To show it on, sort troubleshoot into the search field and click on Troubleshoot settings. The Troubleshoot display seems.
Within the “Really helpful troubleshooting” part, click on the down arrow and select whether or not to have Home windows ask you earlier than working a troubleshooter, run a troubleshooter after which notify you, or run a troubleshooter with out notifying you. On the backside of the part, see if there are any really useful troubleshooters to run, and in that case, run them.
It’s also possible to go to this web page when you’re working into an issue in your PC — for instance, a flaky web connection or an issue with Bluetooth. On the web page, click on Extra troubleshooters and from the web page that seems, run the troubleshooter designed to repair your drawback.
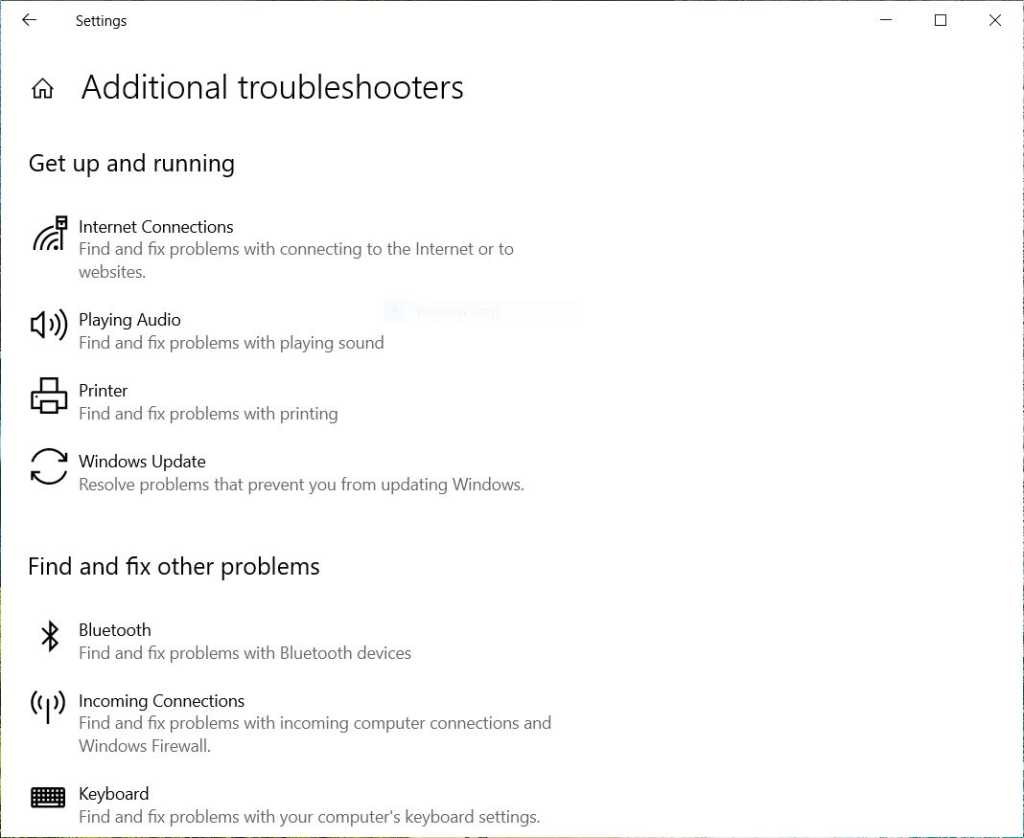
Home windows 10’s built-in troubleshooters can velocity up your PC or repair laptop points.
Preston Gralla / Foundry
19. Shut down and restart Home windows
Right here’s certainly one of IT’s not-quite-secret weapons for troubleshooting and rushing up a PC: Shut it down and restart it. Doing that clears out any extra use of RAM that in any other case can’t be cleared. It additionally kills processes that you simply might need set in movement and are not wanted, however that proceed working and sluggish your system. In case your Home windows 10 PC has turned sluggish over time for no obvious cause, you could be shocked at how far more shortly it’s going to run once you do that.
Attempt simply a few of these tips, and also you’ll discover that you simply’ve acquired a quicker Home windows 10 PC — and one that’s much less more likely to have any reliability issues.
This text was initially revealed in February 2016 and most lately up to date in Could 2025.
Extra assist getting essentially the most out of Home windows